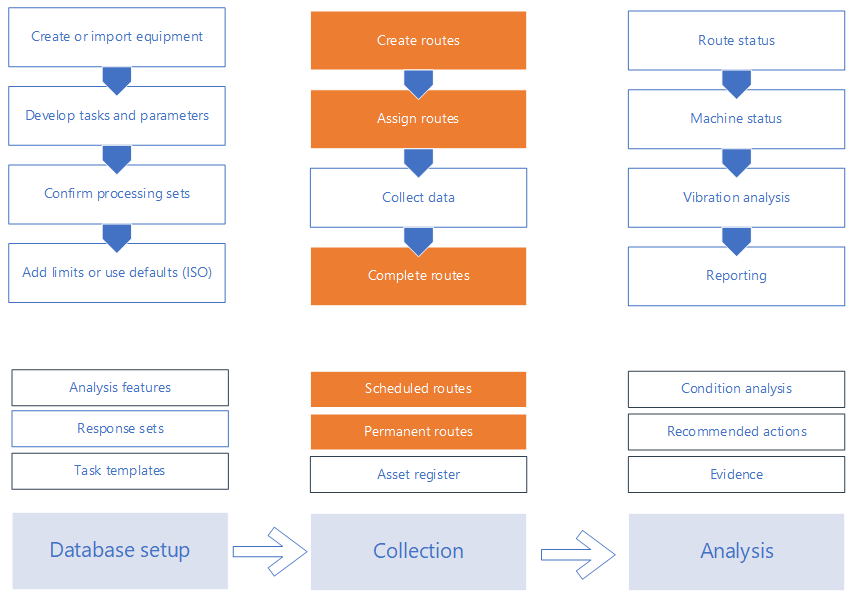
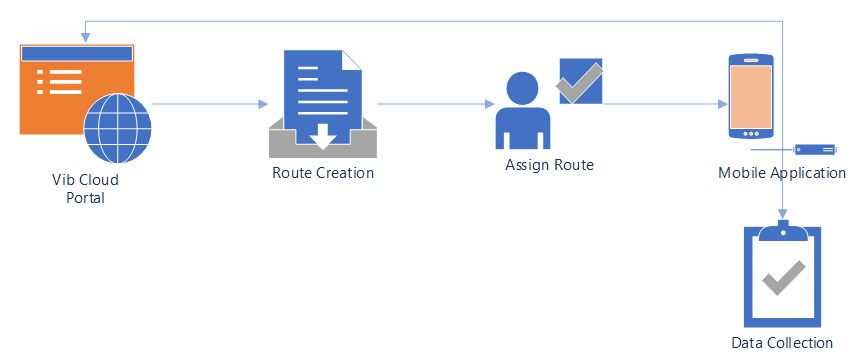
Route in Vib Cloud represent a cluster of equipment and associated tasks grouped for execution by the operator. Each route is created once and can be reused many times to many different operators. Routes are developed and assigned at the web portal while route data collection is done at the mobile application. System do not have limit for the number of routes, you can create as much as needed.
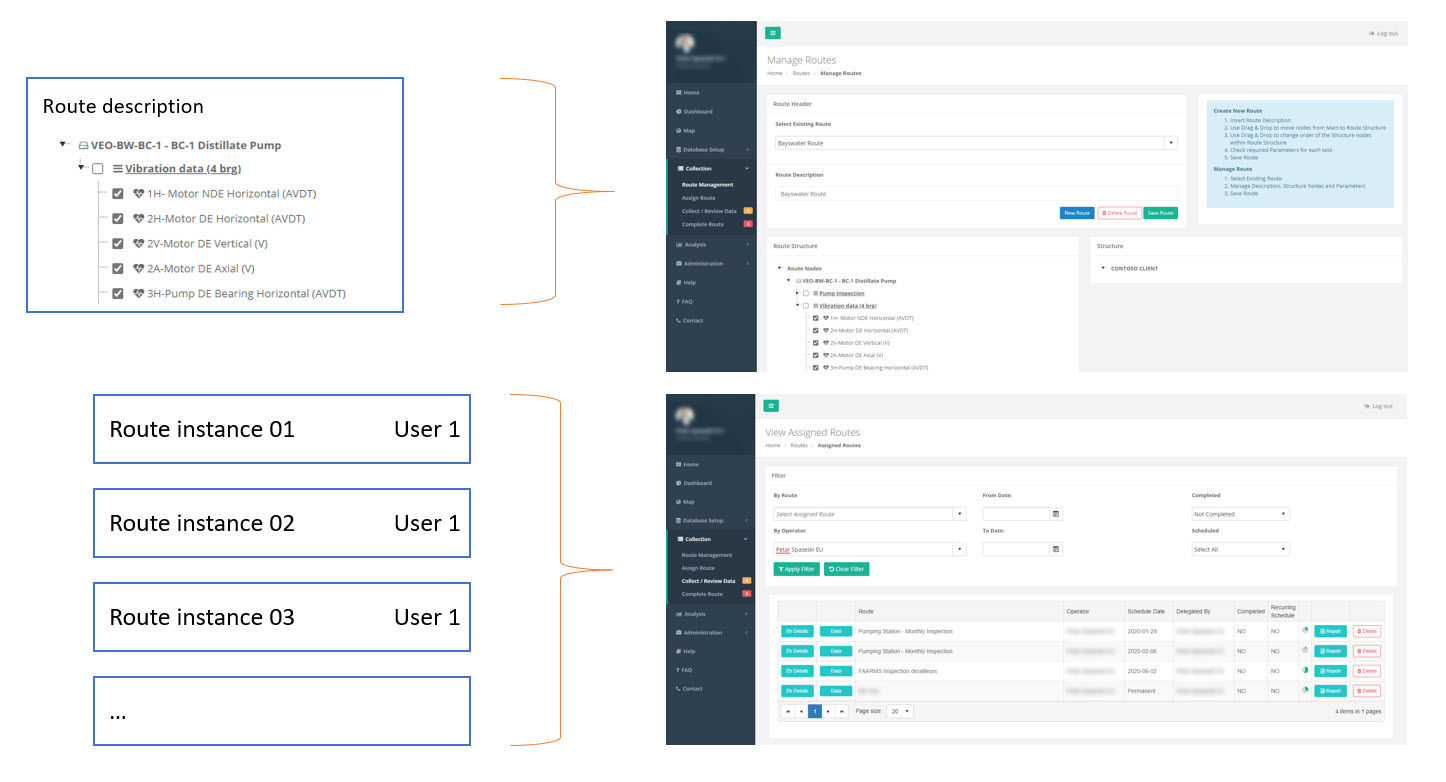
Each route is consisted of route description and route structure. Route desciption is something route to be recognised by while route structure refers to all equipment, tasks and measurement points to be collected for the route. Think of this as a route settings or header to the route package.
Once route is assigned to a practitioner system creates a route instance. Route instances now is a full package holding route settings, practitiner that will execute the work and shcedule for execution. Also, route instance is where data collected is stored. Route can have many instances and once instance is created it will not be affected by furtehr amendments to the route. Hence deleting the route will not delte the route instance. Likewise, when delting route instance data from that particular instance will be deleted not route or any other instance from the same route.
Rote Management
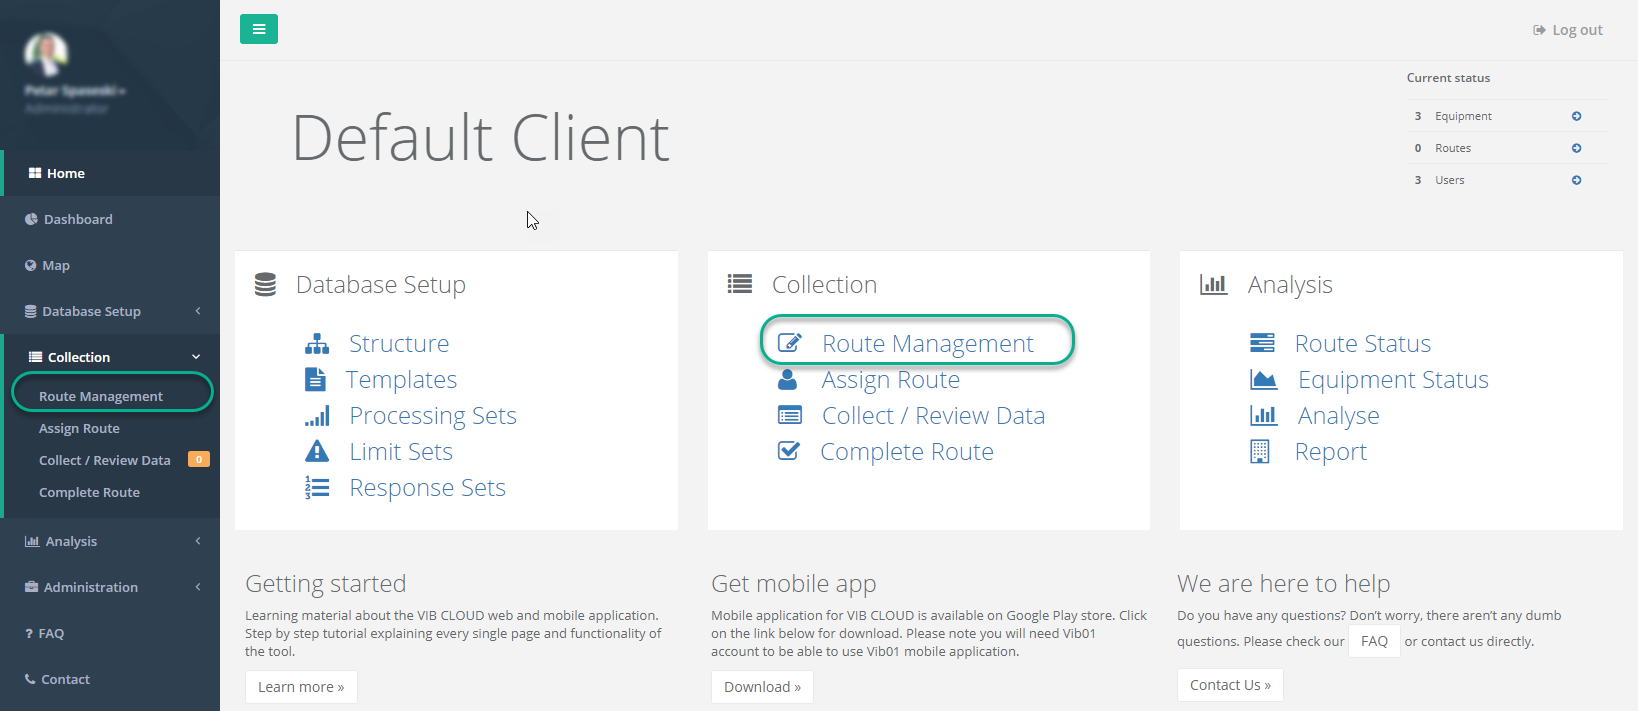
Can be accessed from the home screen by clicking “Route Management” from the “Collection” section or from the menu on the left within same section.
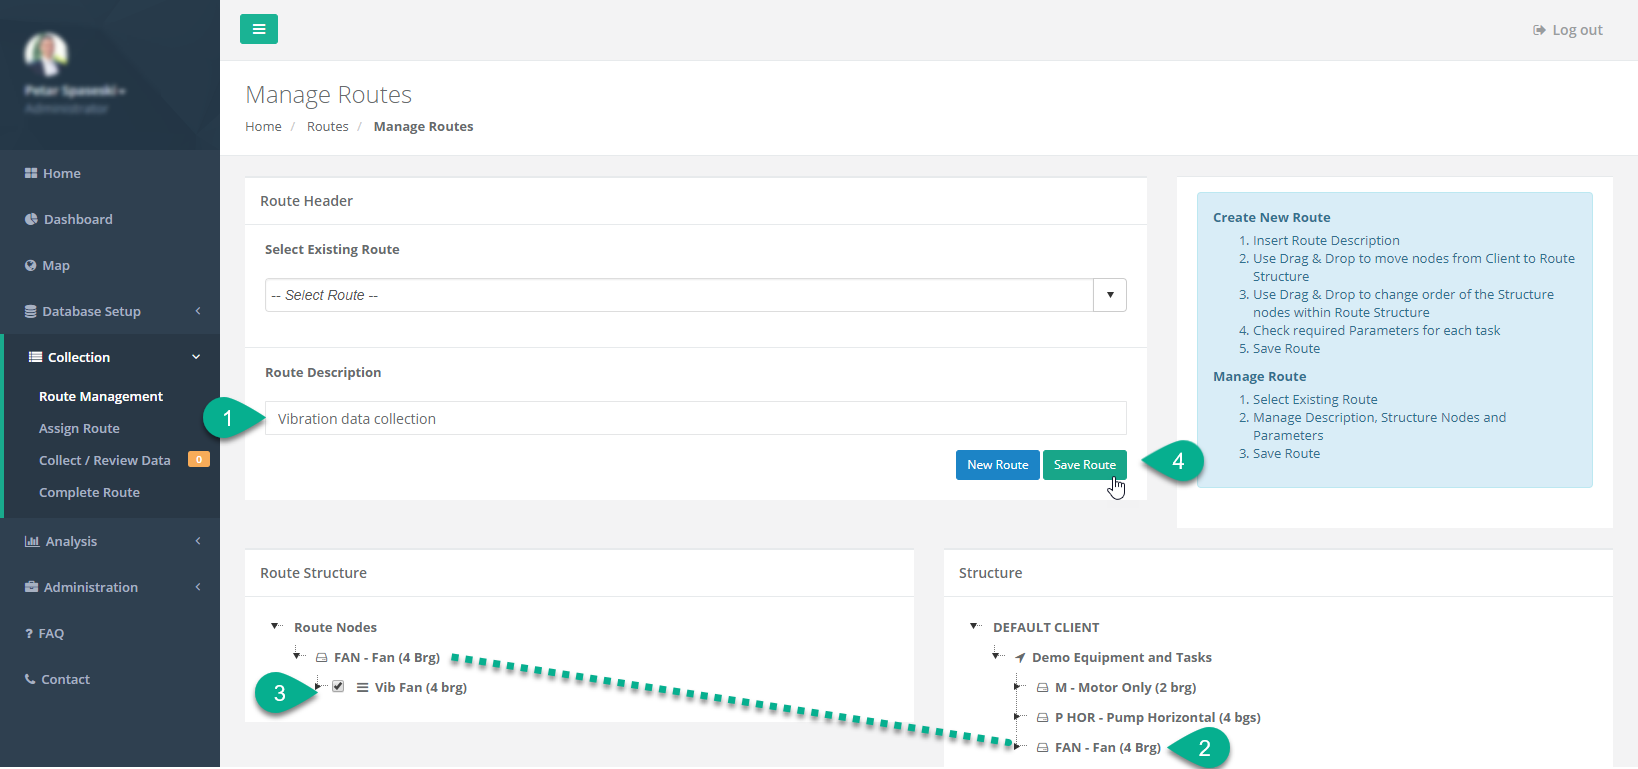
Once inside the “Route Management” module you can create new routes or amend existing ones. To create new route:
Enter route name or short description in the “Route Description” field;
Drag equipment from the “Structure” tree on the right;
Select tasks you want to be part of the route;
Repeat 2 and 3 for all equipment you need them in the route;
Click “Save Route” green button.
To amend existing route please select route you need to edit from the drop-down menu marked as “Select Existing Route”. After select route is loaded in the form below. Perform the changes (same steps as for creating new route explained above) and save the route.
To remove equipment from the route right click on the equipment node you like to remove and confirm the action.
Assign Routes
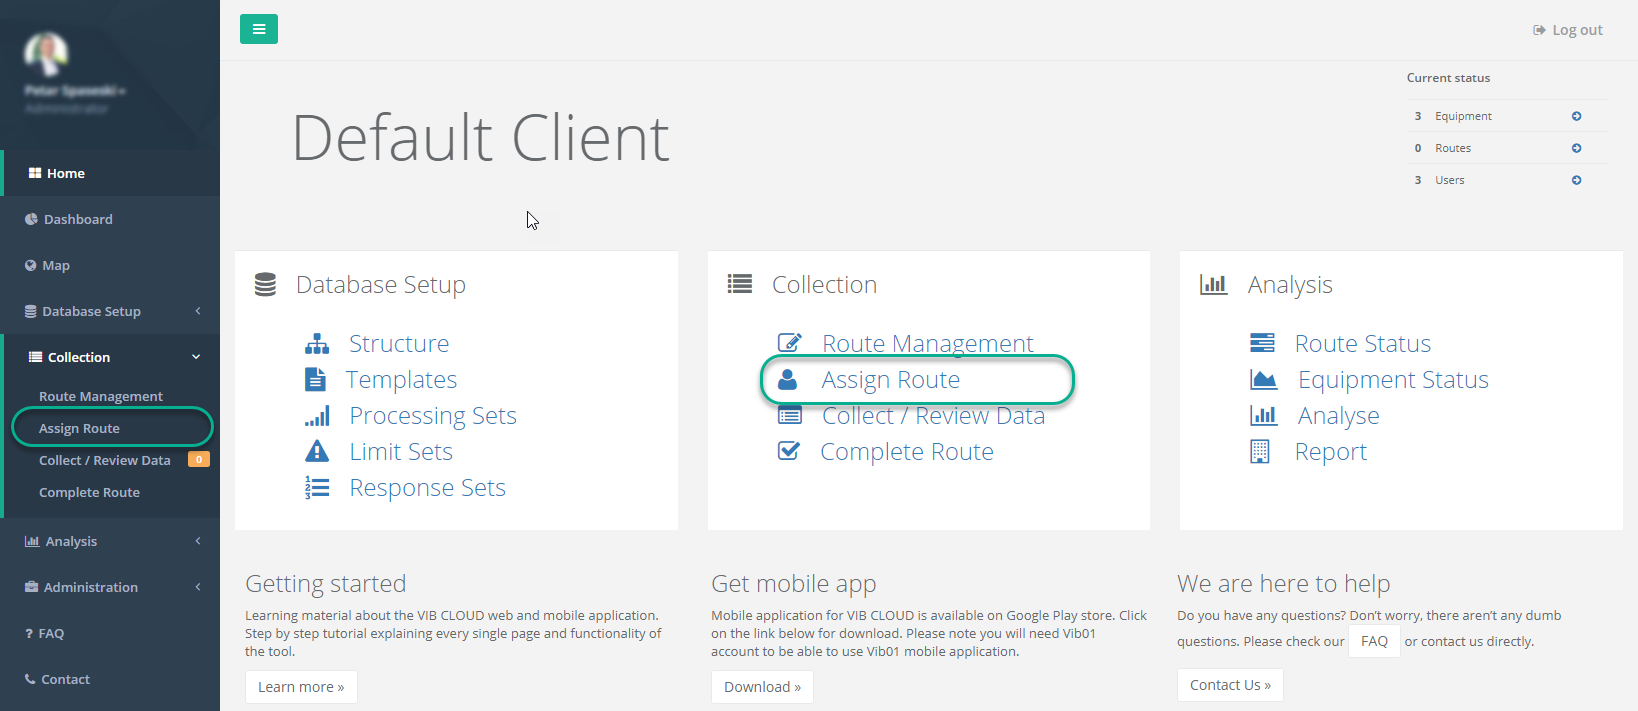
As name suggested “Assign Route” is used to allocate route to operator. It can be accessed from the home screen by clicking “Assign Route” from the “Collection” section or from the menu of the left within same section.
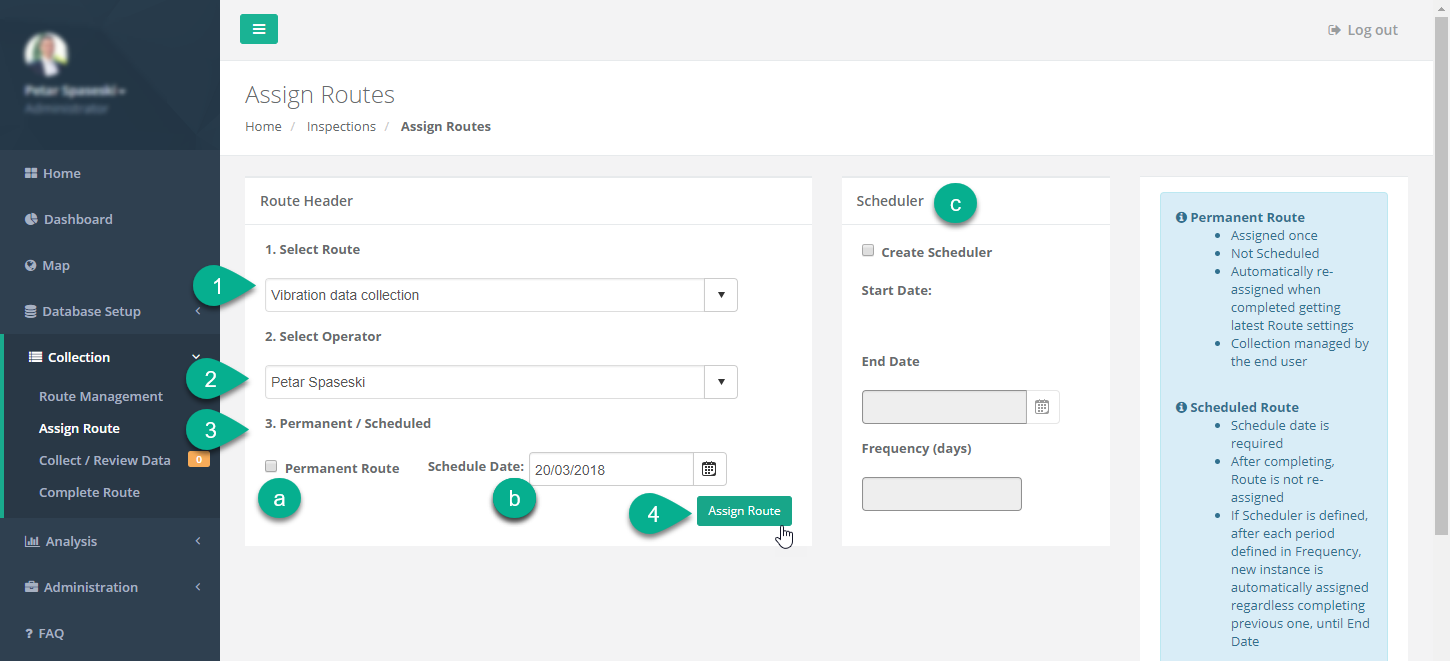
To assign route to the operator:
Select route;
Select operator;
Schedule the execution of the route has three options:
Permanent – set it only once. No scheduling required, route is always available on the mobile application;
Scheduled for a particular date – set date or
Set scheduler to assign route on particular frequency;
Click on “Assign Route” green button.
Note once you selected route you need to assign, software will automatically load it below assigning form and provide better visibility.
Assigned route is in fact an instance of the route created for specific operator to execute. One route can have many instances – can be assigned to many operators and with different frequencies.
Complete Routes
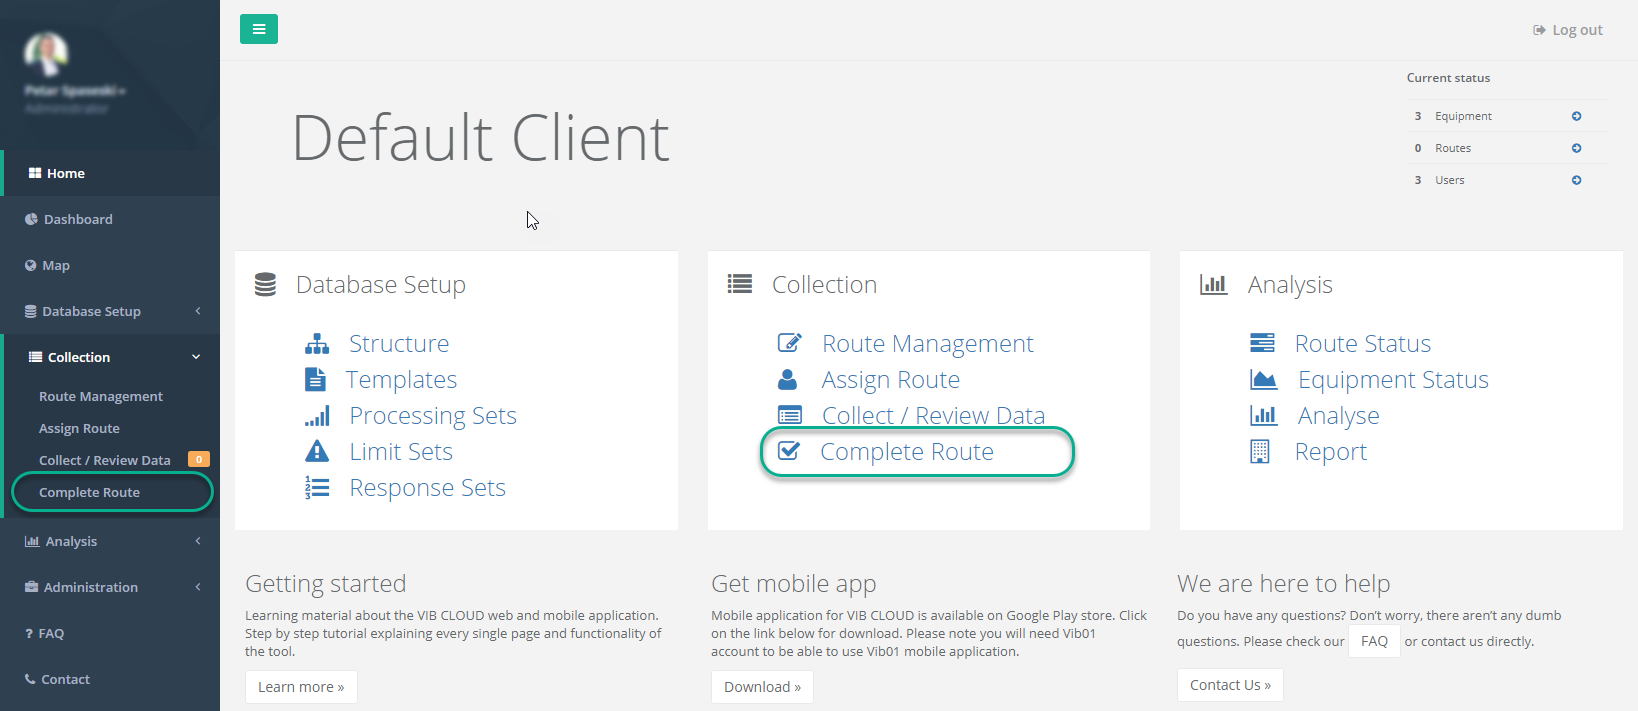
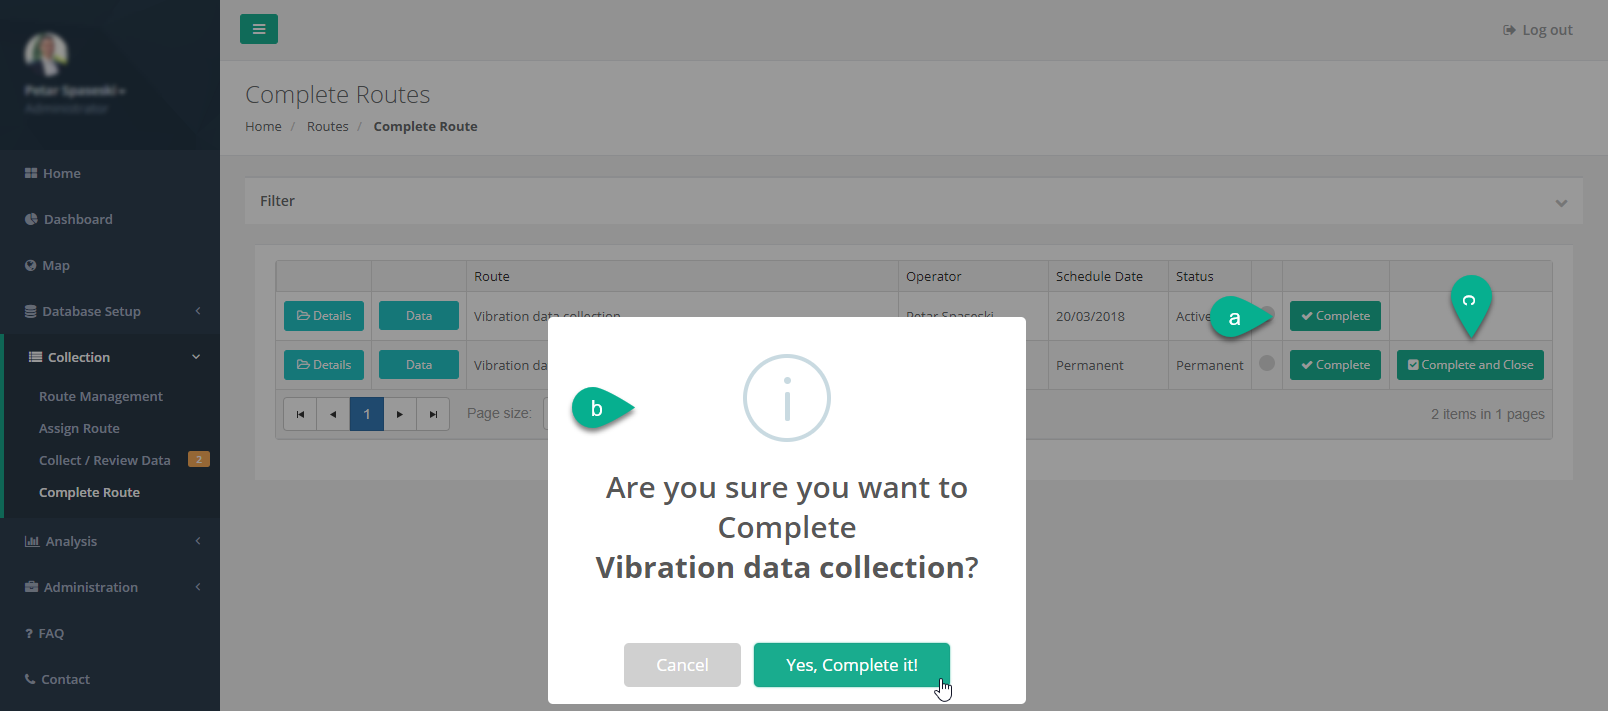
Routes can be completed from the mobile application (explained in “Collect / Review Data” document) or from the web portal. Usually routes are completed from the mobile application as operator have more control and knowledge what has been collected or if route can be marked as a completed even if not entire data is collected. Web portal is rarely used for route completing, only in special cases, example operator lost their mobile device. To complete a route from the web, go to the home screen and click on “Complete Route” from the “Collection” section or from the menu of the left within same section.
All routes assigned to you will be listed in this module and completing any route is done just by clicking on the (a) “Complete” green button and (b) confirming on the following dialog. Once route is completed its data will be ready for further analysis. Please note from this module user can also “Complete and Close” permanent routes. “Complete and Close” option is only available for the permanent routes and by clicking on the (c) button user will be (d) notified that if they complete and close the route, route will be no longer available on the mobile application.
Note: Difference between permanent and scheduled routes is only in the scheduling mechanism. Permanent routes are set only once and without any date related, they work at the operator convenience or schedule. While scheduled routes (with or without scheduler) work on pre-determined schedule.
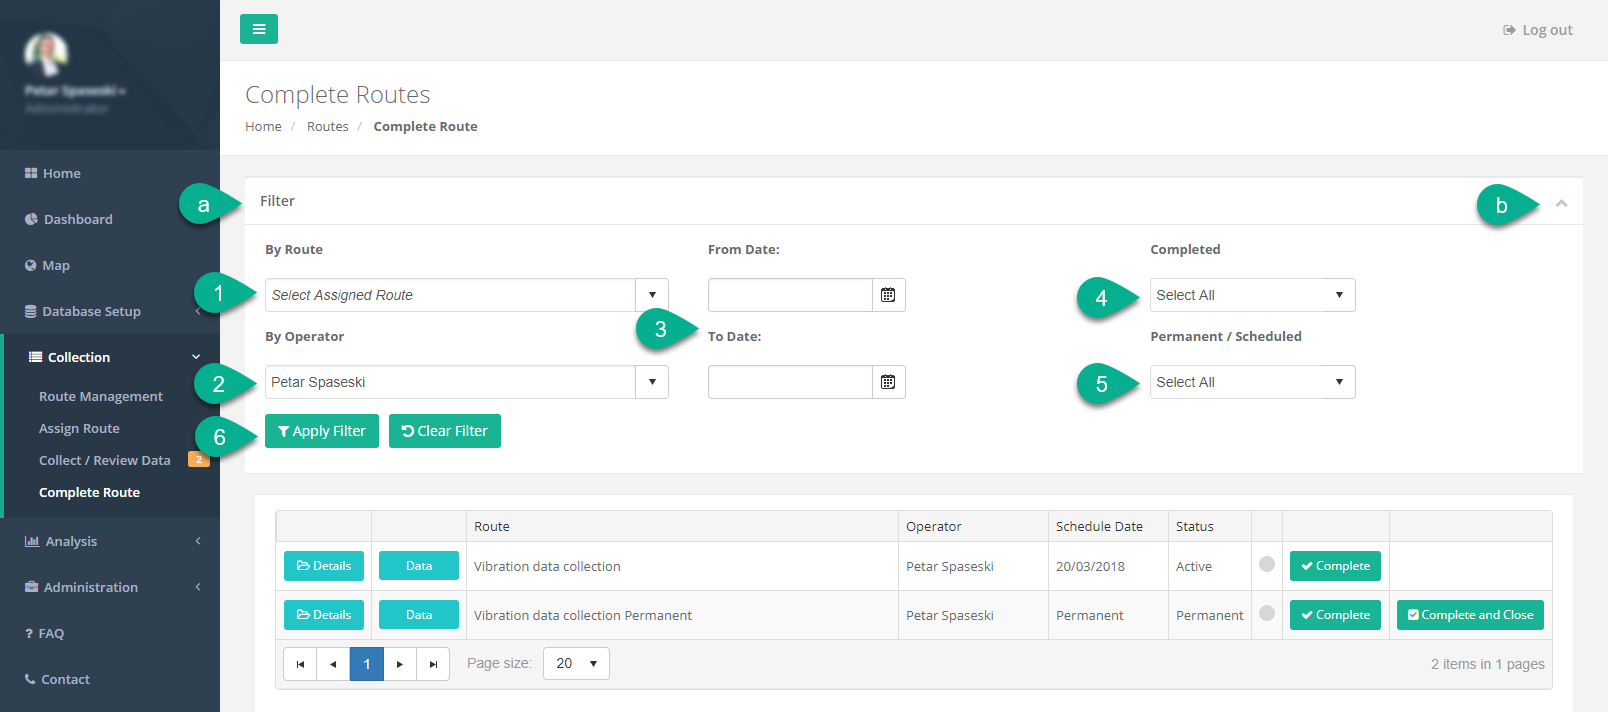
To allow quick access to data complete route provide a filtering option. Filter (a) is located at the top of the screen and collapsed by default. User can open the filter by clicking on the arrow sign icon (b) on the right side of the panel. Filtering can be done by setting options and applying filter:
Route;
Operator – on load of the module this field is defaulted to the logged in user;
Date range (From – To);
Is it completed or not;
Is the route permanent and
Click on “Apply Filter” button.
Deleting Routes
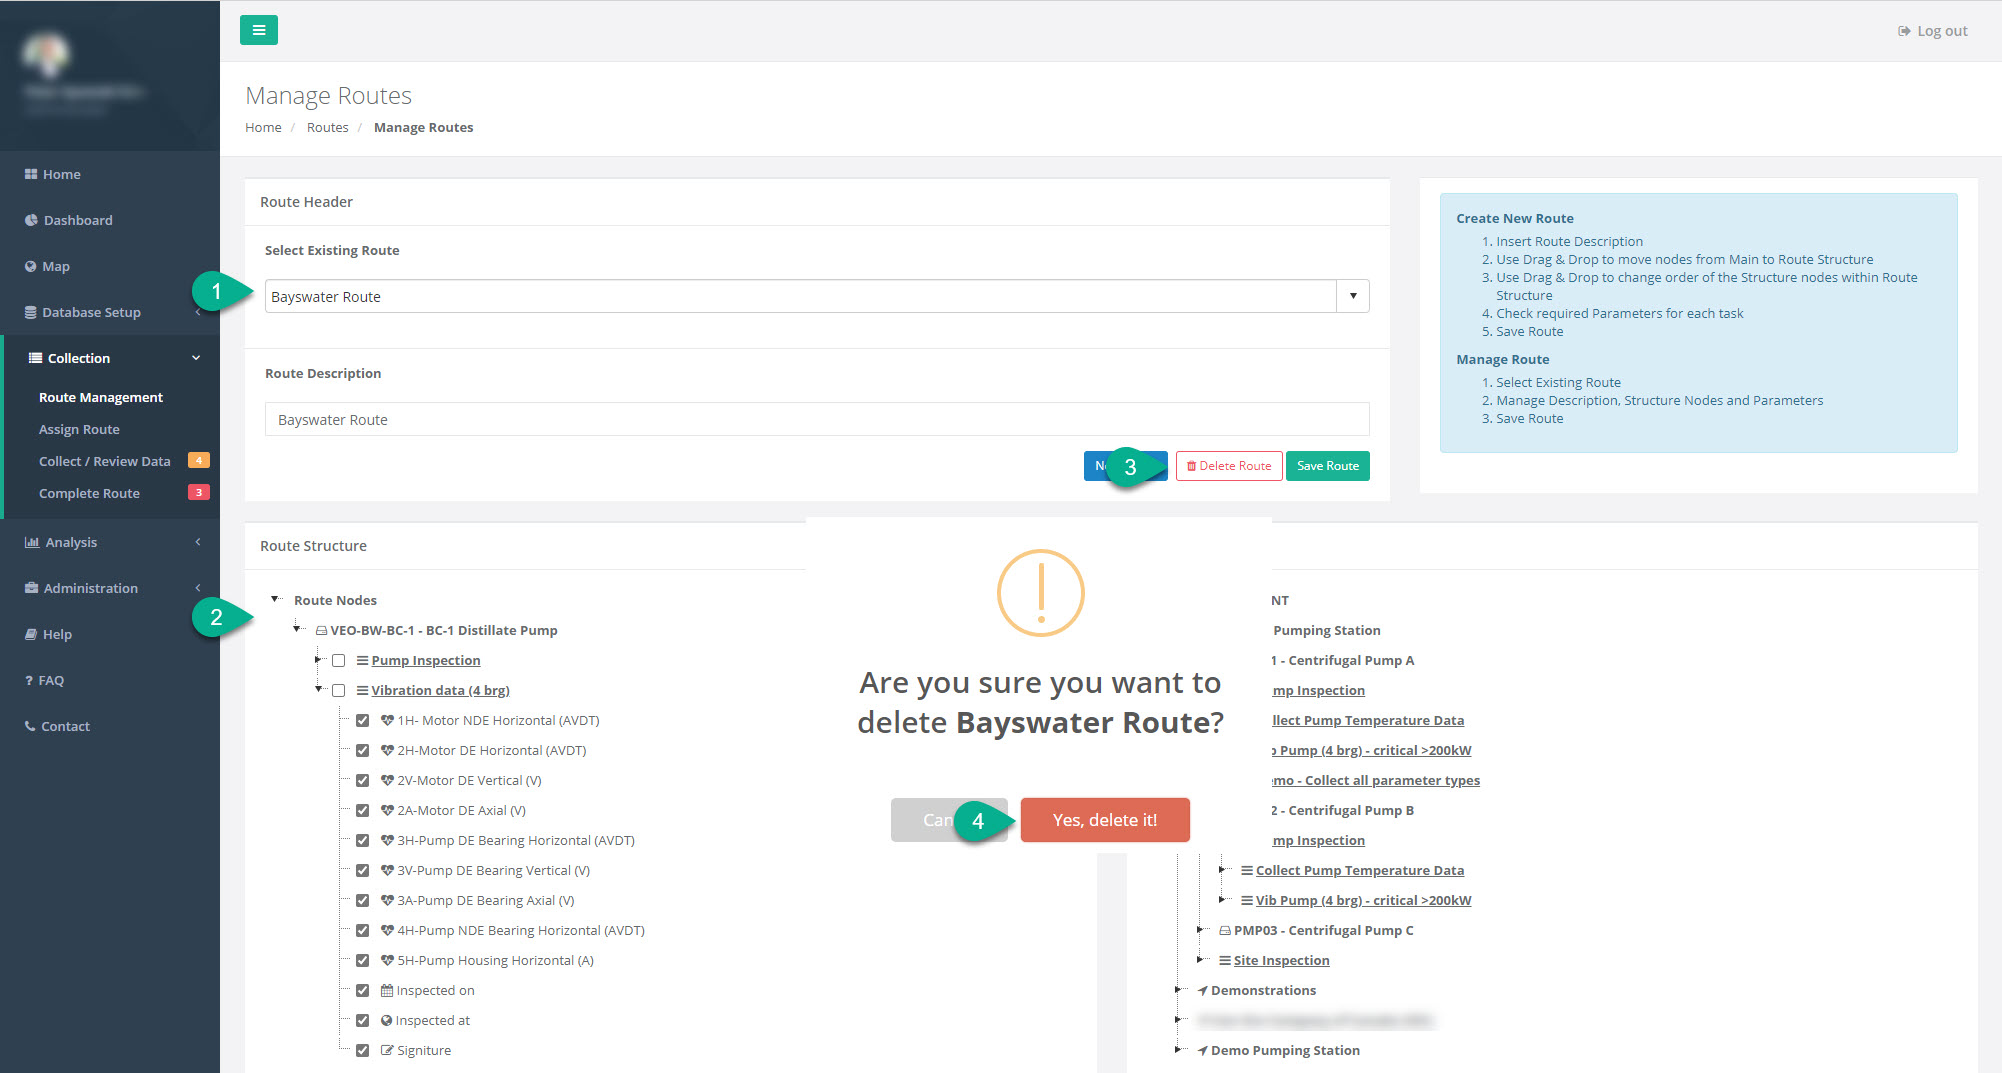
Open route management module and follow those steps:
Select (open) desired route you wish to remove;
Review and confirm this is the route you are after;
Click on “Delete Route” red button;
Confirm route deletion in the pop-up dialog box by clicking “Yes, delete it!”
Please note, by deleting the route you are not deleting the route instances and collected data. Only route settings.
To remove route data, please open “Collect / Review Data” section and remove route instance from there.